The iPhone’s video-recording capability is so good—with up to 4K resolution, optical image stabilization, and continuous autofocus—you really should take advantage of it. For creating a really dazzling presentation from footage shot on a mobile device, you’re best off using desktop video editing software, iMovie stands out from its competitors which offers us intuitive interface, cool trailer creation tool. So this article aims to teach you how to set your device to capture 4k and how to edit and share 4k video with iMovie, if you have the same needs, welcome to read this article.
Part 1. Set Your Device To Capture 4K Video
Part 2. Use 4K video in iMovie
Part 3. Solve “iMovie Can’t Import 4K Video” Issue And Other Issues
Part 4. How To Share A 4K Video
Part 1. Set Your Device To Capture 4K Video
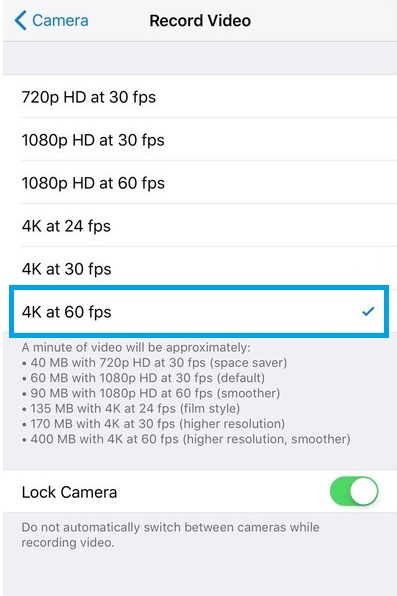
Video recorded at 4K resolution is four times the resolution of 1080p HD video, offering superior sharpness and quality. iMovie lets you edit and share 4K video captured from supported devices. You can capture 4K video using iPhone 6s and later models. Use these steps to set your device to record video at 4K resolution:
- Open the Settings app.
- Tap Photos & Camera.
- Tap Record Video.
- Tap 4K at 24/30/60 fps.

Part 2. Use 4K video in iMovie
After you’ve recorded 4K video, simply add 4K video clips to your project in iMovie for iOS or iMovie for Mac. You can combine 4K video with other types of video clips and photos in the same project in iMovie. Many people complainted that their iMovie can’t export 4k video. This is why? I think you have to pay attention to some matters below.
Note 1. iMovie for iOS
In iMovie for iOS, the clips in your project determine how you can export your project. If the project is entirely photos, or has at least one 4K video, it can be shared at 4K resolution.
Note 2. iMovie for Mac
In iMovie for Mac, the first clip added to your project determines how you can export your movie or trailer. If you want to export a 4K file, be sure to add a 4K clip in the timeline before adding other clips.
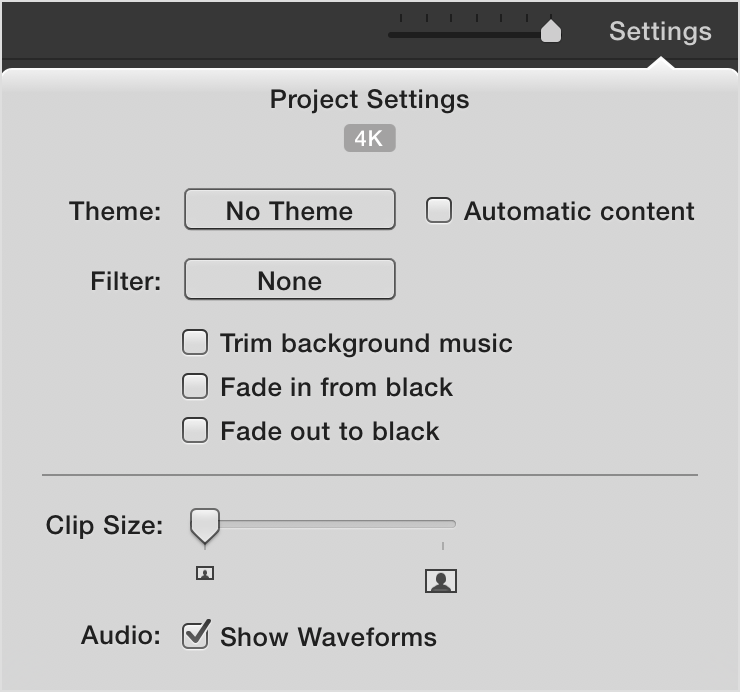
You can confirm that the format of your imported movie is correct by clicking Settings in the upper right side of the timeline. The format of the currently-opened movie is displayed at the top of the Project Settings window.

For those iMovie beginners, you can watch the video below to learn full tutorials.
Part 3. Solve "iMovie Can’t Import 4K Video" Issue And Other Issues
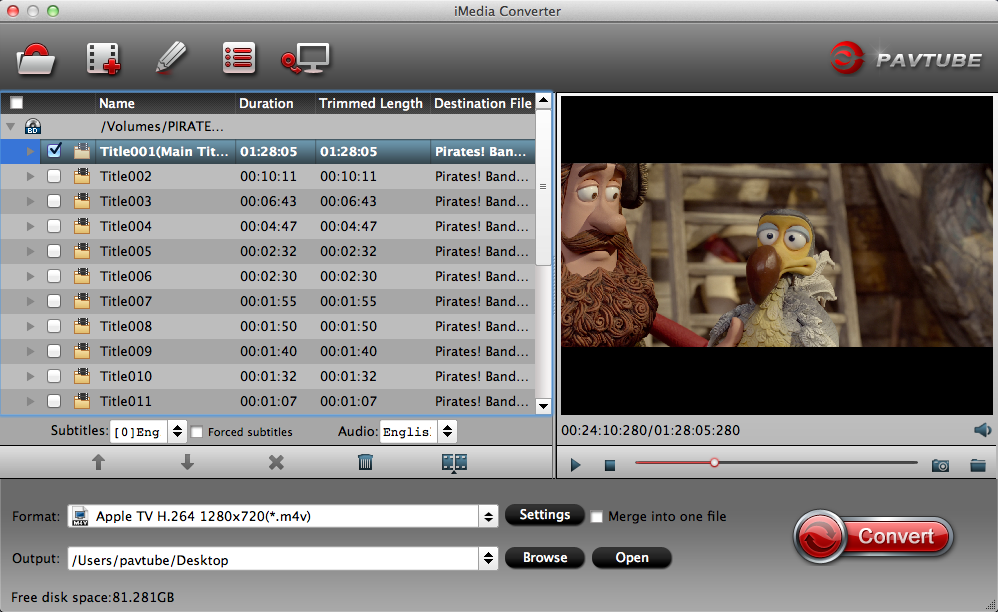
As everybody knows, the source of a 4k vidwo could be everywhere: shot by DJI 4K cameras, doenloaded from Youtube or other video sharing web, captured with smartphone. All those cause the diversity of 4k vdieo formats. So it is common that you fail to import some 4k video to iMovie. Moreover, the final iMovie render file is very large or you fail to upload them to Youtube or other video sharing website due to video formats incompatibility issues, or some video sharing communities has limitation to uploaded videos. I believe that many people are looking for a way to solve this issue "iMovie keeps crashing on iPhone/Mac". Good news, all those problems could be solved in this post. But before we get to start, you have to prepare a third-part software – Pavtube iMedia Converter for Mac | Wins. Below is the screenshot for you to make reference.

You can use this ultimate alternative to help you convert that 4k video to iMovie native supported video format – MOV. Moreover, this program allows you to import DVD, BD, 3D BD, SD, almost any video to this program and output "Apple InterMediate Code (AIC)(*.mov)" for editing in iMovie on iPhone/Mac. So you don’t need to worry about video incompatibility issues, and this method could also help you solve "iMovie keeps crashing" issues.
It offers you hunderds of optimized device presets, so you need not adjust vdieo parameters by your own. You can choose the best output formats according to your target devices.

As we all know, Youtube or other apps has strict limits on the video uploaded. If your render 4k video is too large for Youtube, but you refuse to cut your video, you can use this program to downscale the vdieo.
Click the "Settings" on the UI, you will see a window named "Profile Settings", here you can reduce 4k video size by changing video size(resolution) or bit rate. Normally, video size is based more on bit rate than video resolution. If you insist to preserve 4k resolution, you can skip this step.

Finally, after all settings are done, go to main UI and press "Convert" red button, wait for a while, click the "Open", it will pop up a folder with generated video file. Now you can transfer the video to iMovie for further editing. Below is a video to show you the quick guide of operating procedures.
Part 4. How To Share A 4K Video
Use these steps to export your 4K movie or trailer from iMovie.
iMovie for iOS
- In iMovie, tap Projects.
- Tap the project you want to export.
- Tap the Share
 button.
 - Tap Save Video.
- Choose 4K as the export size. Your movie is then exported to your photo library.
You can also share a 4K movie directly from iMovie to YouTube. When sharing to other online destinations, your movie might be converted to a lower resolution.
iMovie for Mac
- With a movie or trailer selected in the Projects view or opened in the timeline, click the Share
 button.
 - Select File as the destination.
- Next to Resolution, choose 4K.
- Click Next, then save your movie.
You can also share a 4K movie directly from iMovie to YouTube. When sharing to other online destinations, your movie might be converted to a lower resolution.
Related Articles
- Import Homemade or Commercial DVD to iMovie on Mac El Capitan
- How to Export iMovie Project to MPEG-2 for playing on DVD Mac OS X
- Best Formats for iMovie – No Trouble Importing and Editing with iMovie
- How to Add Subtitles to Videos in iMovie on Mac?
- How to Export iMovie Project Files to AVI/WMV/MP4/MOV?
Hot Articles & Reviews
Any Product-related questions?support@pavtube.com

