Source From: makeuseof.com
Apple’s iCloud Drive is one of the coolest new features to come from the company in a long time. Those of you who updated to iOS 8 or Mac to OS X Yosemite will probably noticed a little pop-up window that asked you to activate iCloud Drive. That it is. If you’re confused about iCloud Drive and want to know more about the feature or how it works, keep on reading.
Part I. What is iCloud Drive?
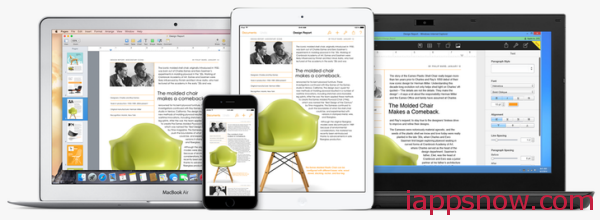
iCloud Drive is one of several ways to store, sync, and update data between your Apple (and even Windows) devices. Apple has now updated its cloud storage system to make it more visible and accessible to users and third-party developers.
Part II: How iCloud Drive works.
1. How to Set Up iCloud Drive
If you’re a new user of Apple devices, and you have an Apple ID account, you should know that some of your Apple content, including apps downloaded from iTunes and the Mac App Store, your iCloud email, and iTunes songs are automatically stored and available in your iTunes and iCloud accounts, which means that data can be re-downloaded, with your password, if ever lost or deleted.
On other hand, you probably have other data, such as documents, photos, and third-party content that is not automatically backed up. This is where iCloud Drive comes in. It can store all your data, sync it between devices, and download it to a new iOS device.
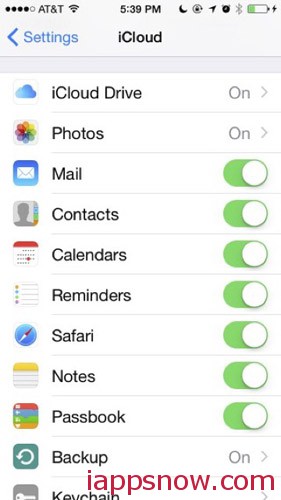
You were asked to update to iCloud Drive when you installed iOS 8 and/or OS X Yosemite. If you didn’t enable it upon installation, it can be accessed on your iOS device via Settings > iCloud then enabling iCloud Drive. You will see a list of default apps and data enabled for backup and syncing.
On your Mac, iCloud Drive is located in System Preferences > iCloud. Enable iCloud Drive, and then click on Options to manage how other applications interacts with your cloud storage. Notice that some data, such as Mail, Contacts, and Safari bookmarks are already stored and synced in your iCloud account.
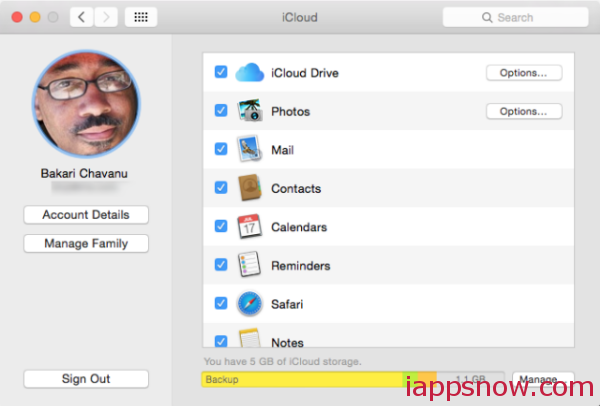
Under Options in iCloud Drive for the Mac and Storage for iOS, you can decide which app data you want backed up and synced to the drive — such as photos, iWork documents, and third-party supporting apps. Some of the listed apps, such as the keychain app 1Password and journaling app Day One, may offer the option to backup to another cloud service like Dropbox. Some apps (like Evernote) may have their own storage solution, which you won’t need to worry about.
Note, you can also backup your iOS data to your Mac hard drive through iTunes for added insurance, though this does require first syncing your iOS device to your Mac using a USB connection.
If you don’t have a Mac you can download iCloud for Windows, which will allow you to to sync documents and photos between iOS, Mac, and Windows devices. With an Apple ID and password, iCloud Drive can be accessed in any web browser, on iCloud.com.

2. iCloud Drive In Action
Once it’s enabled iCloud Drive kicks in and starts working automatically, syncing data between your devices in the background. Unlike the first version of iCloud, iCloud Drive can be easily be accessed in the Finder like other folders. You can store any type of file in iCloud Drive provided it is less than 15 gigabytes in size. When it’s enabled, it will show up in the side column of a Finder window.

This setup makes it easier to add and remove files from your drive, though most often you will save supported files to the drive from within its corresponding app. For example, documents saved in the Keynote or Pages iCloud folder on your Mac will show up in the corresponding app on your iOS device, and vice versa. Changes you make to a document on either device will automatically show up. However, in my experience so far, the sync and update process takes more than thirty seconds. This is bound to improve over time, but is worth remembering for now.

Note: You should make sure on your Mac that you’re saving a document to the appropriateiCloud folder. For example, saving a document to the general iCloud folder will not make it accessible in the Pages app on your iOS device. The document needs to be saved to “Pages — iCloud”. On the iOS version of iWorks documents, documents automatically get saved to iCloud Drive, if the service is enabled.

If you save a document in TextEdit on your Mac, there’s is no corresponding TextEdit app for iOS – meaning you can only access that TextEdit document on another one of your Mac computers. There are also third-party apps, like the text editor, iA Writer, that support iCloud Drive, and you will need to make sure to save documents to its corresponding folder.
3. Managing Your iCloud Drive
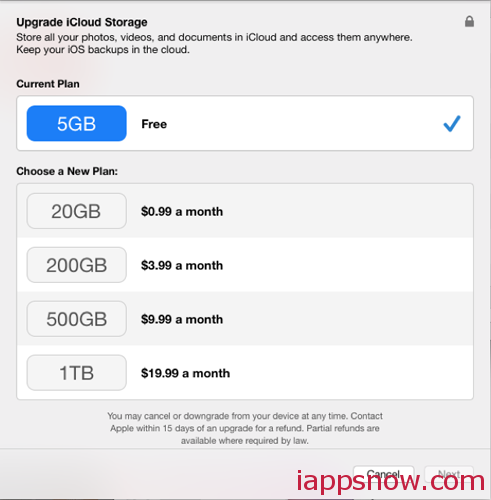
Apple provides users just 5 gigabytes of free iCloud Drive space, but as you add photos and documents to your iOS devices that allotted free space can fill up quite fast. There are ways to manage your iCloud storage rather than paying for more space. You can for example remove photos from your Photo Library, disable apps like the Kindle and Evernote, both of which back up your content to their respective services but there are relatively few gains to be made on the whole.
Content in your iCloud Drive can be managed on any of your devices, under Manage Storage(on both the iOS and OS X), which indicates how much space each app is taking up.
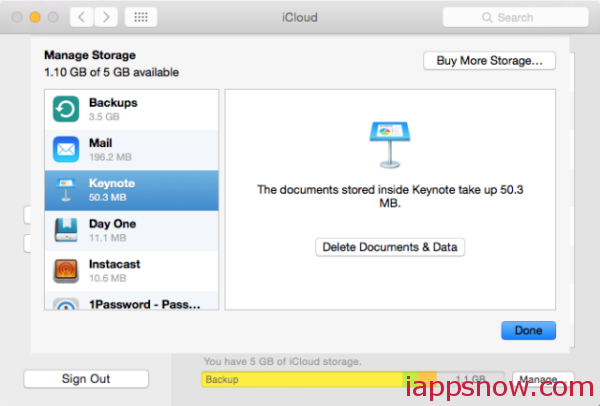
Additional Cloud Drive space can be purchased, starting at $0.99/month for 20 gigabytes, up to $19.99/month for a terabyte of space.
Worth It
iCloud Drive is not as advanced and widely accessible and supported as Dropbox, but it’s nearly essential for maintaining and accessing your iOS data and it’s very useful if you work and share documents between your iOS and Mac devices. The service should improve further over the months to come, and it’s exciting to see Apple putting more control into the hands of its users even if it is still a little restrictive.
How is iCloud Drive working out for you? Or want to know more? Check out Apple’s Overview page for iCloud Drive.
More useful tips for iOS 8:

