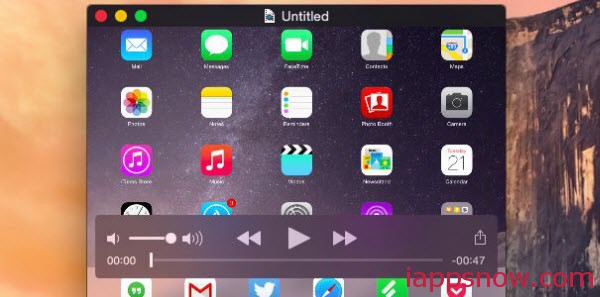
If you have an iPhone or an iPad in hand and a Mac in front of you, I’m excited to tell you that, you can now record your device’s screen thanks to a new “hidden” feature in Mac OS X Yosemite. This feature was designed for app developers, but it can be used by anyone else. But don’t worry; it’s rather easy to use. You can start recording your iOS device within minutes. Get started now!
1. What you need?
- a Mac running OS X Yosemite
- an iOS device running iOS 8 or later
- a Lightning cable to connect them. (It is just an omni-directional Lightning connector on one end and a USB connection on the other. A cable like this has shipped with every iOS device since the iPhone 5.)
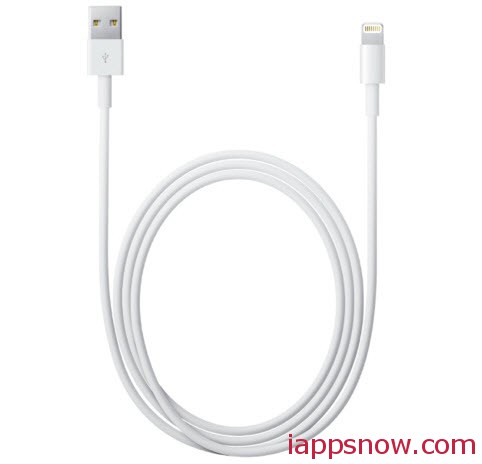
Note: In my testing, I find direct connection to the Mac used for recording is required for relize this feature. Also, this feature is only compatible with iOS devices that have a native Lightning port, so there’s no way to use it on an iPhone 4S or iPad 2 even though they can be updated to iOS 8.
Your iOS device needs to have “trust” with the Mac you’d like to use for recording. If you own a Mac and an iOS device you’ve probably already set up trust between them. If you haven’t, though, just open iTunes with the device connected. The Mac will automatically send a trust request to iOS. Approve it, and you’re ready to go.
2. Ready? Set? Record!
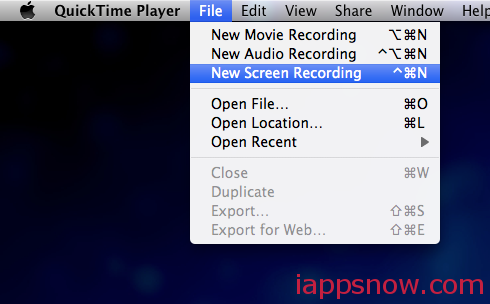
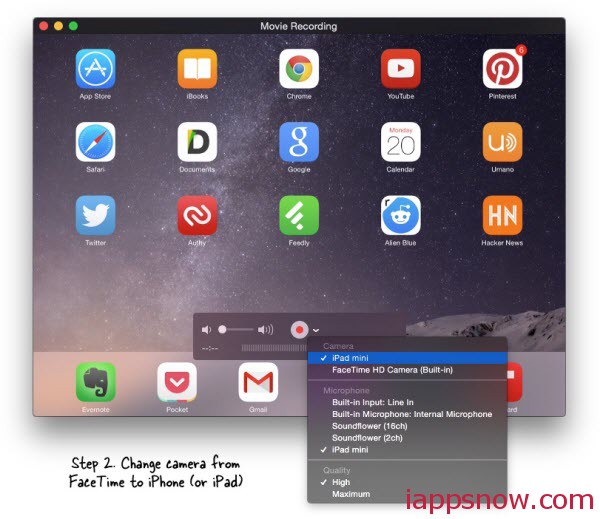
Now its time to record. Open QuickTime player, hit File, and then click New Screen Recording. Your Mac’s camera will be the default device for this, so go hit the down arrow by the record button to open a menu. If all is working you will see your iOS device listed. Select it and QuickTime will automatically switch to your iOS device as the source. You should also switch your Microphone source to your iOS device if you want to record audio with your video.
Once you’ve switched the source you can click the record button to start recording what you’re doing on your iOS device. The recording will update in real-time with only a slight delay. Anything on your iOS device, from web pages to video content, can be recorded.
That’s it! For exmple, if you have finished recording a video tutorial, you can upload it to YouTube or capture a video of your mobile gaming prowess and share it with your friends.
3. Tricks And Features
Recording from your iOS device is quite simple, but there a few tricks you should know. These will help you extract maximum quality from your smartphone or tablet recording.
Switching between portrait and landscape orientation is enabled when you are not recording, but the switch will only happen in an environment that supports both orientations. So on my iPhone 5, for example, I can’t switch from the “tall” to the “wide” view on the home screen because my phone does not support a wide home screen.
a. You can’t switch between orientations after you start recording, however. If you try it, or if you accidentally flip your device, the recording will automatically stop. I also noticed that recording in wide view didn’t work in every app. The YouTube app, for example, would only record a narrow view.
b. As a security feature your iOS device automatically changes its title bar to an “uninformed” bar that does not have your carrier data while you’re recording. Notifications will still pop up, so be careful what you record or turn your notifications off.
c. The recording feature worked with all streaming video sources I tried. This includes both apps (like the YouTube app) and video on web pages. Yosemite’s iOS recording feature could prove to be an easy way to copy video content and I wouldn’t be surprised to see Apple forced to plug that hole if it catches on.
4. Troubleshooting
Having issues getting the feature to work? Here are some suggestions that could sort you out.
If you are not receiving video, or are receiving video only intermediately, try another USB port or another cable. Also make sure the iOS device is in a secure position while recording. The Lightning connector does not sit as firmly as a USB cable or the old 30-pin unit and its very easy to jostle it out of place. Even a slight bump can cause enough of a disruption to stop recording in its tracks.
Also make sure your iOS device’s display is on. You won’t receive video if the display is turned off. The video will freeze if your iOS device’s display automatically turns off during recording, so it’s a good idea to set the display timer to its maximum setting.
Video that’s live but lags could be a sign your recording is competing for bandwidth with other content. I tried recording while importing photos to iPhoto, for example, and found that my recording become fairly jerky while the import took place. Make sure you’re not automatically syncing photos, movies, music or podcasts or backing up your device.
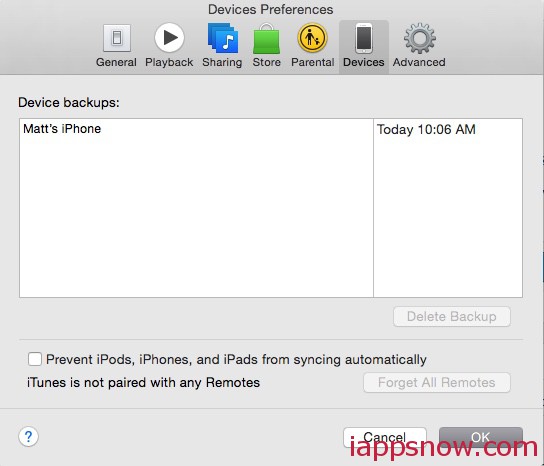
If your iOS device doesn’t sync you may have the feature turned off. Open iTunes, go toPreferences, and open the Device Preferences tab. Make sure the “Prevent iPods, iPhones and iPads from syncing automatically” box is not ticked. Also make sure you’re using the latest version of iTunes and, as said before, you’veupdated to iOS 8.
Conclusion
The ability to record your iOS device’s screen is a welcome addition to Yosemite. While most people won’t need to use it, those who make how-to videos or review apps will absolutely love it. Developers may also find it useful for recording bugs or the way users navigate an interface for future reference. And I can see this being used as a way to record YouTube and other streaming content in a pinch.
More News about Apple:
- Will You Ever Use Apple Pay? [From: MakeUseOf Poll]
- Apple releases iOS 8.0.2 to fix nearly useless iPhone 6(Plus)
- With Awesome Screenshot – Capturing Webpages never be easier
The whole story is here.

