For Mac users, you might have some FLAC files ripped from CD or purchased from digital store. When you try to play the FLAC files on Mac with QuickTime player or sync the FLAC files to iPhone/iPad via iTunes, you may be disappointed to find that all those programs fail to read the FLAC files.
As a lossless audio compression codec, FLAC helps to delivery small audio file with no quality loss, however, unlike other lossy compression audio codec such as WAV, FLAC files is not that accessible. To get full entertainment of FLAC files on any of your desired programs or portable devices, it would be much ideal for you to convert FLAC to WAV.
Hot Search: Best 5 FLAC Converter for Mac | FLAC to iTunes Mac
Best tool to batch convert FLAC to WAV on Mac with no quality loss
There are many programs can assist you to complete the audio conversion job. But if you wish to produce a WAV file from FLAC with fast conversion speed and perfect output quality, you can’t miss Pavtube iMedia Converter for Mac. The program supports batch conversion mode, so that you can batch load multiple FLAC files into the program. With the program, you can efficiently convert FLAC files to WAV file and other popular audio file formats such as MP3, WMA, MKA, M4A, AAC, AC3, etc with no quality loss. To get better output audio quality, you can flexibly adjust output audio profile parameters such as audio codec, bit rate, sample rate or channels, etc.
Merger/Trim FLAC files
Besides converting FLAC files, you can also use this program to merge separate FLAC files into one file or trim the FLAC files to a specific part that you want.
Pavtube iMeida Converter for Mac is available on macOS Sierra and previous version, it is also accompanied by an up-to-date Windows version – Pavtube Video Converter Ultimate for Windows 10/8.1/8/7. In addition, the program also keeps constant update with perfect support for the new Windows OS and Mac OS. Moreover, the program is very easy to use, no matter experienced user or fresh could handle it very well.
|
Get Pavtube iMedia Converter for Mac with 20% off discount, coupon codec: 45K2D47GJH
|
How to Batch Convert FLAC to WAV on Mac with No Quality Loss?
Step 1: Batch load FLAC files.
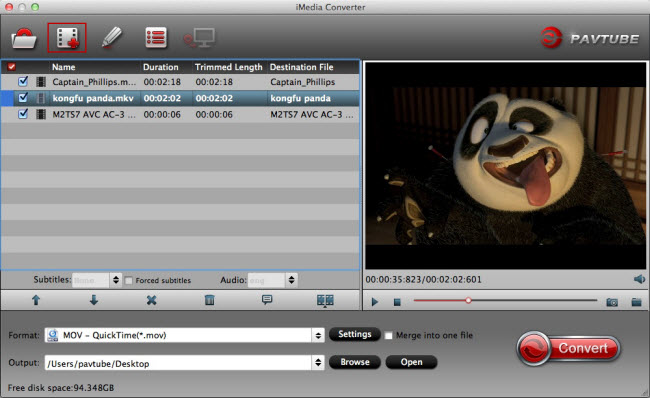
Download the free trial version of the program. Launch it on your computer. Click “File” menu and select “Add Video/Audio” or click the “Add Video” button on the top tool bar to import FLAC audio files into the program.

Step 2: Define the output audio format.
Clicking the Format bar, from its drop-down list, select “WAV – Waveform Audio(*.wav)” under “Common Audio” main category.
Tips: Click “Settings” on the main interface to open “Profile Settings” window, here, you can flexibly adjust the output audio codec, bit rate, sample rate, channels, etc as you like to get better output audio quality.
Step 3: Merge or Trim FLAC files.
Merge selected FLAC audio into one
By checking the “Merge into one file” option beside the “Settings” button, the program will join all the selected FLAC audio into one single file.

Trim or cut FLAC audio length
In the editor window, choose the “Trim” tab and this tab is selected by default when the editing window appears. You can use the trim function to cut off unwanted parts from start and end. You can either drag pointers on the process bar or set exact time point in Start and End boxes to set.
Step 4: Begin the conversion process.
After all setting is completed, hit the “Convert” button at the right bottom of the main interface to begin the conversion process from FLAC to WAV format conversion process.
When the conversion is finished, click “Open Output Folder” icon on the main interface to open the folder with generated files. Then feel free to play the converted WAV files on Mac with QuickTime player or sync to iPad, iPhone via iTunes.
Related Articles
Any Product-related questions?support@pavtube.com


