Created a new Apple ID and try to transfer your own iTunes movies to other account, only to find that your songs, playlists, purchased movies, etc. are stuck in iTunes Library as below?
Q: My daughter has been purchasing iTunes content using my Apple ID (account) for many years. I now have 5 PCs for myself and she has a new laptop. This puts us over the 5 authorized computer limit. I have set up a new, separate apple ID (Account) for her to purchase new iTunes movies. I would like to transfer the music that she has purchased under my account to her new account so I can de-authorize her computer from my account. But I got error messages now and then. Is there a way to transfer the Apple ID (Ownership) of the iTunes content to another Apple ID (Account)?

What a pity! As we all know, we can buy movies, TV shows, songs and eBooks from iTunes with an Apple ID provided. One single Apple ID is permitted to be tied with 5 computers only. (Read Comparison: iTunes HD vs SD Movies) Since movies bought or rented from iTunes movie store are strictly protected by Apple’s Fariplay DRM facilities, to transfer iTunes rentals and purchases to another Apple ID, you need firstly remove the DRM protection from those videos with a third-party iTunes DRM removal tool.
Here I would like to recommend Pavtube ChewTune (Read reviews) which is a smart and professional DRM recorder and converter which can assist you bypass DRM from both iTunes purchases and rentals thus to enable you move all your iTunes library to another account for sharing freely. Besides, you can backup iTunes videos to external hard drive, play with any video player and even copy to any android or windows tablets for watching without restrictions.

 (Click here for Mac OS X 10.5)
Firs Instructions:
1. Make sure that your computer is authorized for source videos, that is to say you can play the source iTunes movies in iTunes.
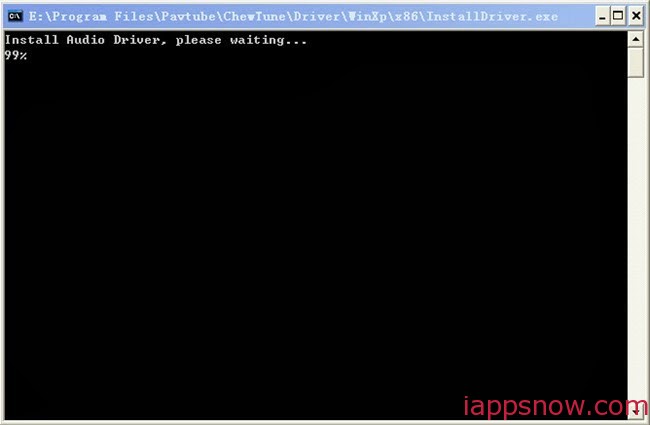
2. Allow the audio driver installed during the Pavtube ChewTune installation.

3. Close iTunes before running Pavtube DRM Removal Converter when converting iTunes M4V movies.
4. It would take as long as the source movie length for the whole DRM video recording process since Pavtube ChewTune records source DRM videos in 1:1 video and audio quality.
Steps to move and share iTunes movies to other accounts
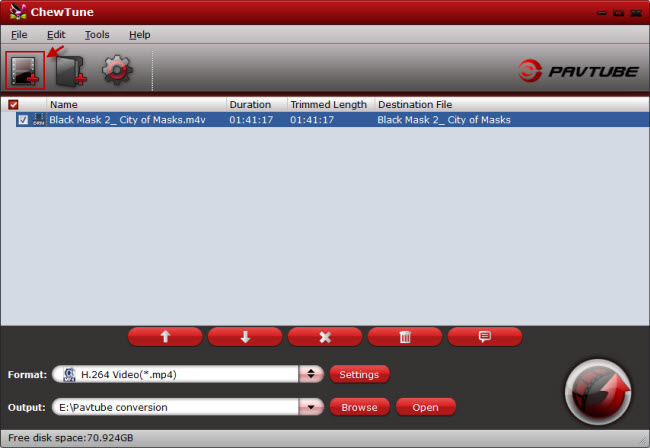
Step 1: Add iTunes movies to the software. After installing, Launch ChewTune and import your iTunes files (including the copy-protected music, movies, TV shows) to the program. Batch conversion is supported so that you can add multiple files to convert at a time.

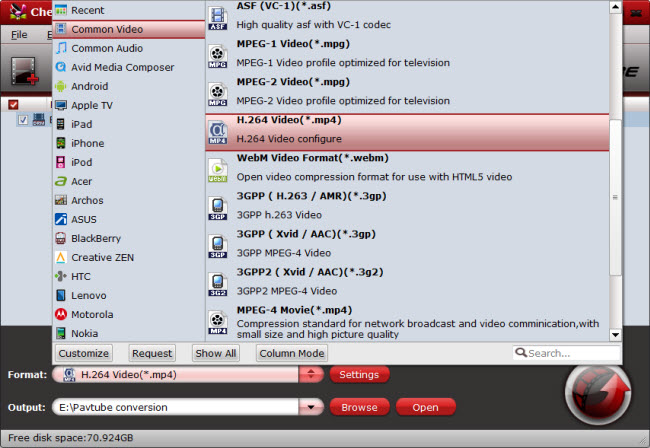
Step 2: Select output format. Click “Format” bar and move mouse to “Common Video” column, you can easily find the profile of “H.264 Video(*.mp4)” which is accepted by most video players and mobile devices. If you like, you can click “Settings” to change the video encoder, resolution, frame rate, etc. as you wish.

Step 3: Start the conversion. After above steps, just hit the “Convert” icon to start converting iTunes M4V videos to MP4 videos. Once the process completes, just log in your iTunes account and import the converted DRM-free videos to iTunes Player for watching and sharing with family members.
In fact, there are other different ways to transfer iTunes Movies to Another Apple ID, but the procedure is somewhat complex, here lists 4 ways of them:
1. Use iTunes Home Sharing
To enable it, select Home Sharing from the left sidebar within iTunes, and enter your Apple ID. Repeat this process on all computers that are to participate in the Home Sharing, all with the same Apple ID. You can add up to five computers this way. Once you’re in a home sharing session, you can simply drag and drop songs from one iTunes library to the other, which is what you’ll want to do to copy your purchases between computers.
2. Copy The Files Using External Media
Your iTunes library is located in User > Music > iTunes > iTunes Media > Music, where your music is usually organised in an artist > album hierarchy. You can also quickly locate a singular song from within iTunes by right-clicking it and selecting Show in Finder.
Copy your purchases to your external media and, after inserting it in the target computer, simply select the whole lot and drag them onto the iTunes application window or icon. This will add all those songs you had selected to that iTunes library.
3. Share The Files Over a Local Network
Copying a large amount of files over your home network is likely to be slower than using a flash drive, but it’s less of a hassle to set up.
Every user on a network with AirDrop selected in Finder are able to see one another. Sharing files from one computer to another then becomes as simple as dragging and dropping your files on the other computer’s icon.
4. Use An iOS Device & iTunes
Finally, if you have an iPhone, or other iOS device that’s been synced with your music library, there’s an even simpler way to move your media between different computers. After authorising the other computer with your Apple ID, plug in your iOS device.
A pop-up will appear — pictured above — which you can use to erase and sync your iOS device with that computer (not what you’re looking to do), but also to transfer your purchases. Choosing the latter option will copy your purchases to that computer, easy as that.
Note: Keep in mind that the files copied this way are still DRM-protected. However, you can authorise up to five computers to manage and enjoy your iTunes Store purchases thereon. This can be done manually by entering your Apple ID in iTunes’ Store -> Authorize this Computer.
Continue Reading:

