The PlayStation Vita (also known as “PSVita” or “PSV”) is the successor to the PlayStation Portable as part of the PlayStation brand of gaming devices. Ever thought of turning PS Vita to your portable media player for watching your favorite movies/TV shows from iTunes anytime anywhere especially during your trip?

Being protected by DRM, iTunes movies can’t be transfered to other devices except for Apple devices. If you want to put iTunes downloaded M4V files on PS Vita, you need to remove DRM protection first, and then convert iTunes movies to PS Vita friendly mp4 for enjoying. What you need is a third-party software which can help you remove DRM protection at first.
Here Pavtube ChewTune (Read review) is just a such powerful iTunes DRM video converter which can help you easily get rid of Apple’s DRM protection from those iTunes M4V. Besides, it is also converts iTunes M4V to PS Vita compatible format while maintaing the original quality. Within just a few clicks, you can put iTunes videos to PS Vita for playback. This article is going to show you how to sync iTunes DRM to PS Vita so that you can enjoy iTunes videos on PS Vita freely.
3 Steps on How to convert and watch iTunes movies on PS Vita
Now, just download and install this iTunes to PS Vita converter on your computer.

 (Click here for Mac OS X 10.5)
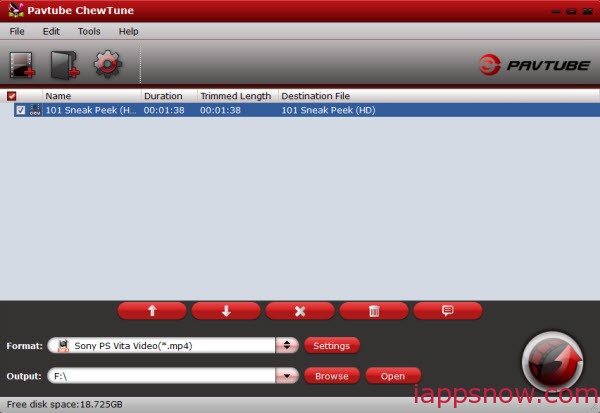
Step 1. Run this iTunes M4V to PS Vita converter. Drag and drop the iTunes files to it or simply load iTunes files by clicking “Add Video”.

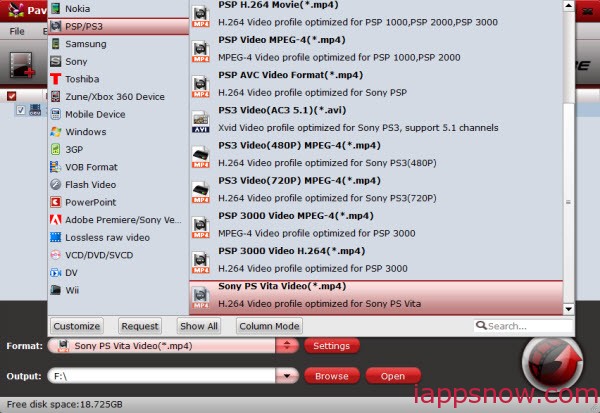
Step 2. Choose the best video format for PS Vita. Click on ” Format ” box, in ” PSP/PS3 “, you will easily find “Sony PS Vita Video(*.mp4)”. Here, you can click “Settings” to customize output bite rate, sample rate, etc.
Read Sony PS Vita supported video formats:
- MPEG-4 Simple Profile Level 3, Maximum 320×240 pixels, AAC
- H.264/MPEG-4 AVC Baseline/Main/High Profile Level 3.1, Maximum 720p, AAC

Step 3. Click “Convert” button to start removing iTunes movies DRM protection and converting iTunes M4V to h.264 MP4 for PS Vita. Now, you just need to wait, when conversion is done, click “Open” to get converted files for video transferring.
How to Transfer the Converted Video to PS Vita
1. Download ‘Vita Content Manager Assistant‘ on PC/Mac. Right-click Vita icon and open ‘Preferences’. Choose the folders that the Vita will access to find, and download, photos, videos, and music.
2. Grab the USB cable from the Vita box. On the Vita, the ‘Content Manager’ icon should be flashing its little head off. Give it a tap and click ‘Start’ to open up this content-transferring app.
3.You’ll be given the choice of connecting to a PS3 or a computer. For this particular “How to”, give the old ‘Connect to a PC’ button a little tappity tap.
4. Click PS Vita to PC, because I want to transfer a snap to my PC. You’ll then be asked what you want to send over: ‘Applications’ (for backup), ‘video’, ‘music’ or ‘photos’. Let’s tap ‘video’.
5. Tick the videos you want to send over, hit copy, and the videos will appear in the folder you specified in Step 1.
Now just play your movies and TV shows from iTunes on PS Vita freely during your trip.
Further reading:

